Decorate walls with custom wallpaper squares
If you are looking for an original and little seen wall decoration, this project that we explain step by step will conquer you. To personalize any room you just need to choose the wallpaper model that you like the most and create squares with it and some wooden moldings .
If you are bored of the same ideas to decorate a wall, then you will like this step-by-step project. You can create a wall decoration or decorative framing with panels created by yourself with the wallpaper of your choice. Go ahead and customize any room in your house!
Why go for a paper mural to decorate?
This original and not very frequent way of using wallpaper consists of creating pictures with wallpaper and wooden moldings that you will have to place as a frame to decorate the walls. You will give life and, above all, volume - the main characteristic regarding wallpaper pasted on walls - to the surface you choose to place the mural on.
It is very attractive to give a very elegant and French-style air - due to its origins in Parisian art from the Romantic period of the 19th century - to a living room or to compose the most unexpected headboard that frames the bed in the main bedroom. It is also an excellent alternative to decorate corridors that are very long. You decide if you want square or rectangular shapes, if you prefer to put squares up to half a height or along the entire wall. The possibilities of compositions are very varied and of choice of the paper that will decorate the mural, almost infinite because you can use a single paper or combine several.
Materials & Tools needed
- Tropical Wallpaper
- Molding e21 64x28mm 1x2m
- Glue ready vinyl paper 5kg benkola
- Glue ready for vinyl paper 1kg
- Plaster adhesive
- Cutter
- Sponge
- Spirit level
- Ruler or metal square
- Pencil
- Mountain range
- Plain p & t kit + tape


Step 1
Cut the pieces of wallpaper
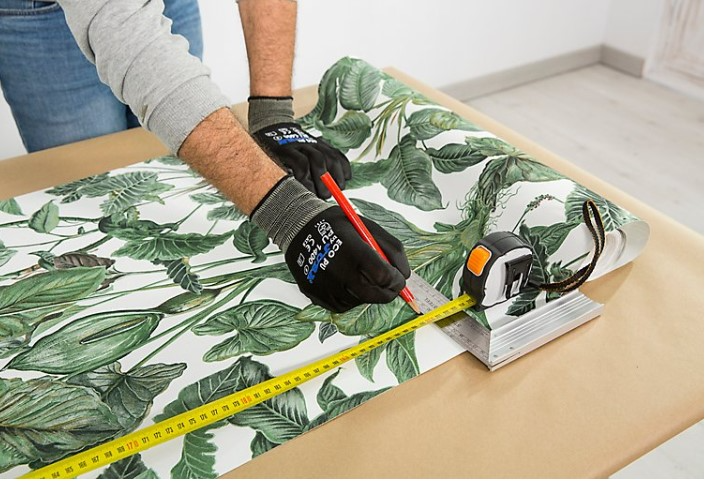
Step 1.1: Spread the strip of wallpaper on a work table and mark the length you want to take to the wall with this decorative frame.


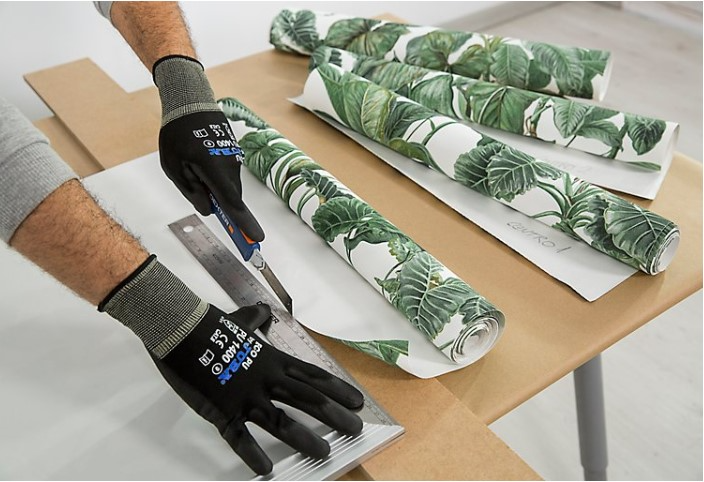
Step 1.2: Cut as many pieces as you need with the help of a ruler or metal square and a cutter. For the narrower pads, you just have to cut two identical strips that will be approximately 50 cm wide, which is the standard measurement for wallpaper rolls.


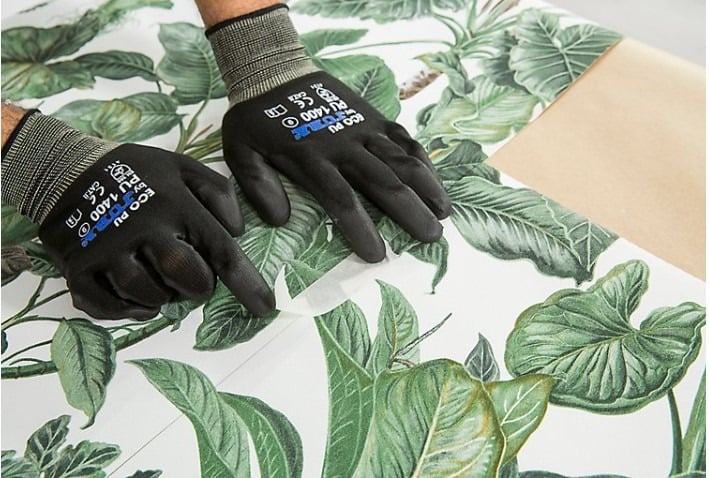
Step 1.3: The central panel is twice as wide, that is, 1 m, because it consists of two strips. To cut them correctly you must take into account the reason for the case paper. To do this, cut a strip and match the drawing of the second paper strip on the exposed side. Glue them with a little painter's tape so they don't move, mark and cut the second strip to the same size.
Step 2
Glue the strips of wallpaper
Apply the appropriate glue to the back of the wallpaper with the help of a roller or flat brush. Respect the manufacturer's instructions that appear on the product you have chosen.
Step 3
Glue the wallpaper to the wall
Now you can stick the strips of wallpaper to the wall in the position you have decided (and that you will have previously marked on the wall so that each panel is at the same distance and height.
Help yourself with a level). Start by attaching the top edge of the strip, and then pinning the paper from top to bottom and inside to outside, smoothing it down with a sponge or soft cloth to prevent wrinkles and bubbles from appearing.
Step 4
Frame the paper with moldings
Step 4.1: Take measurements of each of the edges of the wallpaper rectangles and transfer them to the chosen plaster moldings. They will be the framework of each piece.
Step 4.2: Using a handsaw, cut each of the pieces, and then use a metal square to mark each end at an angle so that the joint of all the slats is finished with a miter. Cut with the saw.
Step 4.3. Apply a strip of plaster adhesive to the back of each slat and place them in place on the wall (so they are perfectly straight and level with each other using a level), over the edge of the wallpaper, so that it does not lift in no case over time. Pay attention to the corner joint so that the moldings fit properly.
Cut as many pieces as you need with the help of a ruler or metal square and a cutter. For the narrower pads, you just have to cut two identical strips that will be approximately 50 cm wide, which is the standard measurement for wallpaper rolls.
